Self-hosting on a Linux smartphone [Smartphone Revival Project]
Breathing new life into a discarded smartphone by using it as a Linux server.
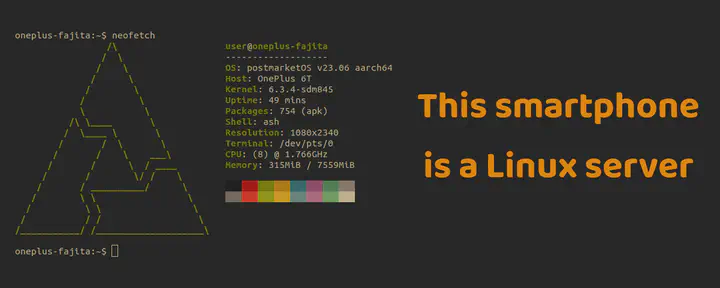 Output of the neofetch command on a OnePlus 6T running postmarketOS
⚠️️ Warning This is educational content only. Proceed at your own risk. Please read the disclaimer below if you wish to proceed with the steps described in this blog post.
Things can go wrong, including but not limited to, bricking your phone. 📱 ➡ 🧱 😢
Context
This blog post is part of a series entitled Smartphone Revival Project where we investigate how discarded but functional smartphones can be repurposed as small computers.
For anyone planning to self-host apps and services or simply have a computer readily available as a playground, single-board computers have been one of the typical go-to devices. Smartphones are also emerging as viable alternatives for this purpose. Indeed, with their respectable specs, their ubiquitous availability, their relatively short service life and the existence of Linux OSes such as postmarketOS, it is becoming possible to reuse them as tiny and yet powerful computers. There is arguably also added ecological benefits to this, due to their low electrical consumption and the delaying of their disposal in a landfill.
The assumption in this blog post is that you have a smartphone running postmarketOS. Head onto the first blog post of this series to see how it can be installed on a OnePlus 6T for example. postmarketOS is compatible with other devices, so you might still be lucky if yours is not a OnePlus 6T.
ℹ️ If your phone cannot run postmarketOS and you still want to explore self-hosting, you can try out Termux, keeping in mind benefits and drawbacks of that solution as explained here. Please also note that the steps below are only relevant to postmarketOS devices.
Let’s get started! 🥳
Headless setup and performance
SSH
To use a postmarketOS device as a headless computer, we will have to enable SSH. This can easily be done by running the following commands directly on your phone, via the console app.
# default sudo password: 147147

# enable the SSH daemon
sudo service sshd start
# ensure sshd is enabled on every boot
sudo rc-update add sshd
Once you have connected your phone to your local network via WiFi (use the Graphical UI on the phone to do so), you can then SSH into it from another machine.
# type this on you phone's console app and look for 'inet addr' for device 'wlan0'
ifconfig
# from another machine, where x.x.x.x is your phone's IP address
# default password: 147147
ssh user@x.x.x.x
ℹ️ For increased security, it is recommended to use SSH keys to connect to the phone. See this section in the postmarketOS wiki for relevant steps. There is also a useful troubleshooting section on that same page.
From this point on, any command below to be run on the phone is done via an SSH session.
Display Manager
In order to free up some RAM and since we want to run this smartphone headless, let’s also change the UI to the basic console. Commands below assume that you are using the Gnome UI and its display manager gdm. For other display managers, see here.
sudo rc-service gdm stop
sudo rc-update del gdm
sudo apk del postmarketos-ui-*
sudo apk add postmarketos-ui-console
ℹ️ In our tests, this freed up about 375MB of RAM. Sweet!
Docker
One of the best ways to run a headless server is to use containers as this gives access to many pre-configured tools and services but also allows playing with sandboxed systems without blowing up the host. Luckily, installing docker is easy on postmarketOS.
# let's first upgrade packages on the phone
sudo apk update
sudo apk upgrade

# install Docker
sudo apk add docker docker-compose
ℹ️ It is highly recommended to run Docker in rootless mode. This reduces potential attack vectors on your phone. Here is a guide on how to achieve that on Alpine. You may need to open up TCP/UDP ports for external traffic by adding nftable rules when running rootless docker on postmarketOS. See the relevant section below.
Performance testing
Next, let’s do some performance testing! As a reminder, we are using a OnePlus 6T in this example. Our version of that phone comes with an 8-core ARM 64-bit CPU, 8GB of RAM and 128GB of disk space. Quite a good pack of specs for a small computer.
We will run run the official nginx container on the phone so that it can be hit by our performance testing tool.
docker run -itd --rm -p 8080:80 --name target_server nginx
By default, the nginx container serves a welcome page. We can verify that by running the commands below on the phone.
sudo apk add curl
curl http://localhost:8080

# you should see a response with an HTML payload
We will run our performance tests against that welcome page with bombardier, an HTTP benchmarking tool.
Install bombardier and run the following on another computer on the same local network.
# send 1M requests to the target server using up to 500 concurrent connections and 3s timeout
bombardier -c 500 -n 1000000 -t 3s http://<SMARTPHONE_IP_ADDRESS>:8080

You should eventually see an output similar to this:
Bombarding http://<SMARTPHONE_IP_ADDRESS>:8080 with 1000000 request(s) using 500 connection(s)
 1000000 / 1000000 [==================================================================================================] 100.00% 2691/s 6m11s
Done!
Statistics        Avg      Stdev        Max
  Reqs/sec      2695.03    1243.32    7681.95
  Latency      185.49ms   101.91ms      7.40s
  HTTP codes:
    1xx - 0, 2xx - 1000000, 3xx - 0, 4xx - 0, 5xx - 0
    others - 0
  Throughput:     2.36MB/s
It took 6m11s to process the requests. They were all handled successfully, with an average of 2695 requests/second. Not bad! 😁
Our smartphone is probably pushed a little to its limits here, especially given that its ultimate use case is simply going to be as a server on a local network. But hey, who can do more, can do less.
Optional: opening up TCP port 8080
postmarketOS has by default restrictive nftable rules, which is obviously a good security measure.
If you have installed Docker in rootless mode, here is how to open up port 8080 for wlan TCP traffic.
# add nftable rule for TCP port 8080

sudo cat > /etc/nftables.d/52_wlan_inet.nft
Then copy and paste the following content.
#!/usr/sbin/nft -f

table inet filter {
	chain input {

		iifname "wlan*" tcp dport 8080 accept comment "Accept TCP port 8080 on wlan*"

	}
}
Restart the nftables service.
sudo rc-service nftables restart
Self-hosting
In this section, we will explore some self-hosting options for our postmarketOS smartphone.
NextCloud
NextCloud is a collaboration platform that offers many features out of the box or via easy-to-install applications. Capabilities include uploading pictures, collaborating on documents, streaming media, project planning and many other integrations.
It also has an official docker image that comes with reasonable defaults.
ℹ️ During our tests some actions on the NexCloud UI, such as opening up the photo gallery app, randomly caused the smartphone to reboot itself. We did not investigate further but fine-tuning CPU and memory constraints may be required for a more stable setup.
Running a NextCloud container
The simpler setup
In its simplest form, the NextCloud docker container can run with an embedded SQLite database. This is sufficient to just try out the tool but not recommended if you are planning to use it in the long run. Indeed with this setup, if the container disappears, so may your data.
If you just want to test out this simple setup, run the following on your phone.
docker run -d -p 8080:80 nextcloud
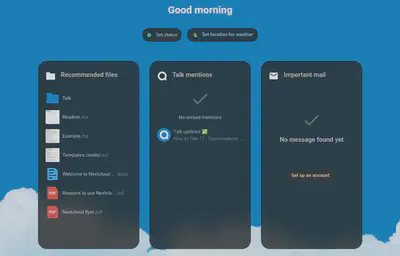
If you then open up a browser on any computer in the same local network, you can visit http://<SMARTPHONE_IP_ADDRESS>:8080 and play around with NextCloud. 😀
A more robust setup
The docker-compose file below, taken from the official NextCloud documentation, defines a database container to be deployed alongside nextcloud. On your smartphone, save the content below in a file named nextcloud.yml and replace passwords to any string of your liking.
version: '2'

volumes:
  nextcloud:
  db:

services:
  db:
    image: mariadb:10.6
    restart: always
    command: --transaction-isolation=READ-COMMITTED --log-bin=binlog --binlog-format=ROW
    volumes:
      - db:/var/lib/mysql
    environment:
      - MYSQL_ROOT_PASSWORD=some_db_root_password
      - MYSQL_PASSWORD=some_db_password
      - MYSQL_DATABASE=nextcloud
      - MYSQL_USER=nextcloud

  app:
    image: nextcloud:27
    restart: always
    ports:
      - 8080:80
    links:
      - db
    volumes:
      - nextcloud:/var/www/html
    environment:
      - MYSQL_PASSWORD=some_db_password
      - MYSQL_DATABASE=nextcloud
      - MYSQL_USER=nextcloud
      - MYSQL_HOST=db
Run the containers:
docker-compose -f nextcloud.yml up -d
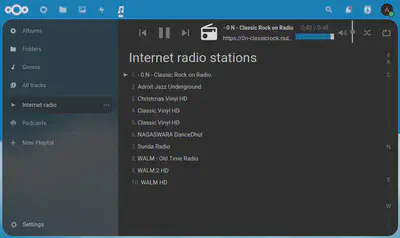
To make this setup even more robust, one would have to consider maintenance aspects such as updates, backups, security scans, etc. If you are interested in taking that route, you can have a look at the NextCloud all-in-one version for inspiration.
Syncthing
This is how the Syncthing authors describe their tool:
Syncthing is a continuous file synchronization program. It synchronizes files between two or more computers in real time, safely protected from prying eyes. Your data is your data alone and you deserve to choose where it is stored, whether it is shared with some third party, and how it’s transmitted over the internet. - source: syncthing.net
A spare smartphone with plenty of disk space running Linux sounds like a great candidate to run this tool! 📱↔️🖳
We will run this in a container. The installation instructions are located here. We also have to open up a few TCP and UDP ports as explained here.
Let’s first add nftable rules for the relevant TCP and UPD ports. Follow the optional section above if you have not yet created the custom nftables rules file /etc/nftables.d/52_wlan_inet.nft.
Put the following rules in the chain input section of that file:
iifname "wlan*" tcp dport 22000 accept comment "syncthing - Accept TCP port 22000 on wlan*"
iifname "wlan*" udp dport 22000 accept comment "syncthing - Accept UDP port 22000 on wlan*"
iifname "wlan*" udp dport 21027 accept comment "syncthing - Accept UDP port 21027 on wlan*"
iifname "wlan*" tcp dport 8384 accept comment "syncthing - Accept TCP port 8384 on wlan*"
Restart the nftables service.
sudo rc-service nftables restart
We can then create a directory on our smartphone that will contain the synced data. and run the syncthing container.
mkdir ~/syncthing-data
Create a file named syncthing.yml.
---
version: "3"
services:
  syncthing:
    image: syncthing/syncthing:1.23
    container_name: syncthing
    hostname: my-syncthing
    environment:
      - PUID=1000
      - PGID=1000
    volumes:
      - ~/syncthing-data:/var/syncthing
    ports:
      - 8384:8384 # Web UI
      - 22000:22000/tcp # TCP file transfers
      - 22000:22000/udp # QUIC file transfers
      - 21027:21027/udp # Receive local discovery broadcasts
    restart: unless-stopped
Run it!
docker-compose -f syncthing.yml up -d
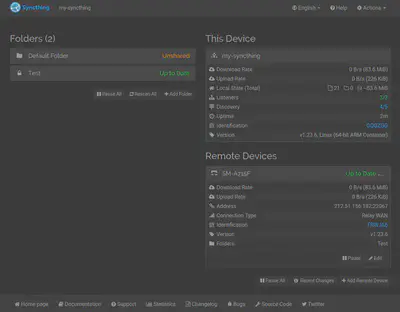
You should be able to open up the syncthing UI on a browser from a computer on the same local network at http://<SMARTPHONE_IP_ADDRESS>:8384.
chat-ui
Interacting with Large Language Models through a chatbot is becoming more and more common, with the chatbot from OpenAI, ChatGPT, being the most famous example. It is also possible to run chatbots and LLMs on commodity hardware PCs, albeit with a smaller parameter count. Currently, typical models for commodity hardware are pre-trained at maximum of 65B parameters while GPT-3 has 175B parameters and GPT-4 has 1.76T parameters.
In our tests, it has been harder to run the Hugging Face chat-ui + LLM stack on a Linux smartphone, not only because of lower computing and memory capabilities, but also because running and/or compiling the relevant tooling for ARM 64 CPUs can be somewhat complex. Even more so if you add Alpine’s use of musl libc to the mixture.
It is however possible to run chat-ui only on our smartphone and have it connect to a remote model running on a more powerful machine.
Let’s try that out! 😀
We first have to create a Hugging Face account so that we can then generate an access token.
- Create an account at https://huggingface.co/
- Once logged in, click on your profile icon at the top-right of the screen and go to
Settings -> Access Tokens. Click onNew Token, give it a name and Role of typeread. Finally, generate the token.
Head on to an SSH session on your smartphone and run the following to get our clone of chat-ui ready.
sudo apk add --update nodejs npm git
git clone https://github.com/huggingface/chat-ui.git
cd chat-ui/
git checkout v0.4

# ensure that the chatbot will be available on the local network and running on port 8080
sed -i 's/vite dev/vite dev --host --port 8080/' package.json
If you have not opened up port 8080 on your smartphone yet, see the relevant section above.
Copy the previously generated token and paste it to a config file as shown below.
# assuming you are in the top-level chat-ui directory
echo "HF_ACCESS_TOKEN=<YOUR_ACCESS_TOKEN>" >> .env.local
echo "MONGODB_URL=mongodb://localhost:27017" >> .env.local
Time to run the chatbot.
# this database will store chatbot application data
docker run -d -p 27017:27017 --name mongo-chatui mongo:5.0

# run the chatbot
npm install
npm run dev
On a browser, visit the URL http://<SMARTPHONE_IP_ADDRESS>:8080. You should see the chatbot UI!
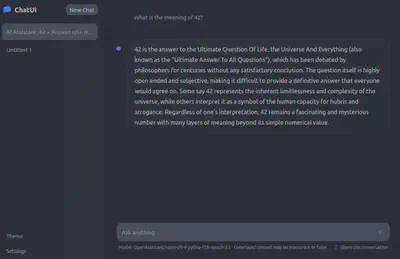
You can play around with the default model or connect to a different one as explained on the chat-ui README document.
One key thing to remember while using LLMs is that the generated content may be false or inaccurate, even if the answers sound assertive or definitive!
Enjoy!
Disclaimer
This is educational content only. Proceed at your own risk.

In no events shall the authors of this content be liable for any claim, damages or other liability arising from the use of this content.

We do not warrant or assume any legal liability or responsibility for the accuracy, completeness, or usefulness of any information, product, or process disclosed.